Showing posts with label Battle Drills. Show all posts

November 05, 2024

Problem 1 - Deployment - Translated

What follows is my translation (using Google Translate and some common sense) of the first Problem in Rommel's 1940 edition of "Problems for Platoon and Company". These problems/exercises were originally intended to be performed in the field, to simulate that we will be using Combat Mission Battle for Normandy. Each problem will have an accompanying CMBN scenario where you can try to learn the lesson Rommel intended.

Translated text will be in black text and my comments in blue. 

Problem 1: Deployment

Troop: 1 Rifle Platoon

Location: 3rd platoon at the end of the formation (1st Company/F.R. 1; attachments: 1 Heavy MG half platoon (two guns) and 1 spotter* team) Marching on a road to the east, approaching the eastern edge of the very dense forest (B). See sketch!

*Blinftruppe” in the original text was translated by Google Translate as “Blind Squad”, so I made the assumption that this might have been a small team to assist the heavy machine guns with target identification.


The 1st infantry Platoon is 600m in front of the company. The company commander (in charge) has just received a message from a Cavalryman. In the east, in the distance, you can hear individual shots being fired.


Intended Actions:

After the exercise has begun (3rd platoon on the march), the company commander (in charge) verbally orders the platoon leader, who has been summoned by signal: "Weak enemy identified by cavalry spearhead in Village (H) (5km east of here).”


The company begins its march outside this forest: 2nd platoon and company troops on the right. 3rd platoon to the left of the road. The Heavy MG half platoon follows the company at a distance of 300m on the road.


I will be with 2nd platoon.”


Potential Solutions:

The 3rd platoon leader orders, without moving back, either: 

a) By signal: "Direction of march left of the road", "Increase the distance between the platoons and the gap to 150m". The platoon then deploys: 1st squad in the front line stays about 150m to the left of the road, 2nd and 3rd squads follow to the right or left in staggered formation with a distance of 100m between them. 4th squad and the mortar team follow 1st squad at a distance of 200m. Platoon leader with 1st squad.”


The platoon leader informs the squad leaders about the enemy and his own intentions only after deployment has taken place. He also deploys troops for security.


Or:


b) Verbally to the quickly summoned squad leaders: “Weak enemy in Village (H) (5km from here) engaged by cavalry.


The company continues its march outside the forest with the 2nd platoon on the right and the 3rd platoon on the left of the road.


3rd platoon deploys on the march! Movement direction is towards the group of trees on the left of the road! Let’s go platoon! Security: 1st squad forward, 3rd squad 250m from the 2nd platoon! I'm with 1st squad! Repeat the orders and fall out!”


I tried, with the translation to be as faithful as possible to the original text. 

There will be some differences with the accompanying Combat Mission scenario where I adjust distances and initial setup locations. The problem remains the same, the player must deploy their 3rd Platoon, and this is the real point of the exercise, then cross the open ground in whatever formation deemed best. Then they must decide whether to continue the scenario to attack the village or not. I highly recommend playing it through to the end, and seeing if you can coordinate your attack with 2nd Platoon. 

Use the Battle Drill Tactical Toolbox as required.

Download Combat Mission Battle for Normandy scenario (Save file to the SAVED GAMES folder, then load saved game to play):  Rommel Problem 1 Deployment
Note: This scenario requires the Commonwealth Module for CMBN.

May 06, 2019

Battle Technique - Using Alternate Firing Positions

The intent of this post is to highlight how effective using alternate firing positions can be when playing CM. This doesn’t necessarily have to be a defensive tactic, but even when attacking it can be a useful method to minimize the exposure and thus the vulnerability of your units.

I highly recommend, especially in the modern CM games (CMBS and CMSF 2), but in all of the WW2 games as well to use a tactic similar to the one I am demonstrating because it will:
  • Minimize unit exposure to AT weapons, i.e. other tanks, ATGMs, RPGs, etc.
  • Will help keep your units from easily being spotted and targeted... in contrast to taking up one position and sitting on it for an extended period of time
  • Could have a psychological impact on your opponent
A Battle Position is described as:
“...a defensive location oriented on a likely enemy avenue of approach. ... A commander's use of a battle position does not direct the position of the subordinate's entire force within its bounds since it is not an AO. Units as large as battalion task forces and as small as squads or sections use battle positions. They may occupy the topographical crest of a hill, a forward slope, a reverse slope, or a combination of these areas. The commander selects his positions based on terrain, enemy capabilities, and friendly capabilities.”
FM 3-90 Tactics Part 3 Defensive Operations
It is not enough to find a good key piece of ground however, the tactics you employ from that position are key to its effectiveness.

There is a US Army document that I highly recommend 66 Stories of Battle Command, the first story is called “Company Team Knows it Sector”. It is a story about a small Company Team that using alternate firing positions and a defense in depth managed to destroy the entire elite OPFOR Regiment at the National Training Center (NTC). From the story:
"One young company commander, with five tanks, two Bradleys, and some dismounted infantry, destroyed about three motorized rifle battalions… It was absolutely brilliant."
"They killed a few OPFOR vehicles early on which caused the OPFOR to slow down a little bit. What they did following that, which was very smart on their part, was after firing a number of rounds and killing a number of OPFOR vehicles, they withdrew off of that high ground into their prepared fighting positions which were on the reverse side of Red Pass."


“It just so happened there was one tank crew in a wadi on the north side of Red Pass. One tank crew who had reconned to the nth degree and knew every inch of that wadi. As the OPFOR's assault elements and engineer assets approached the obstacle, that one tank crew started taking them under fire and killing every one of them. They would fire two rounds, duck down in the wadi, move along the wadi, come up to another firing position, fire a couple of rounds, duck down, move to another position, come back up, fire a couple of rounds and so on. So, as far as the OPFOR was concerned, they thought they had a whole platoon, maybe a company, off on their left flank, and it was one single tank that was using the terrain very, very well, and had boresighted their weapon system.”
Company Team Knows its Sector, 66 Stories of Battle Command

Note the highlight added to the passage above. This was the same technique I used on BP 1 during my AAR as you will see.

NOTE: The image above is from a map I created of Red Pass at NTC for the CMBS game.


IN ACTION - CMSF 2 BETA AAR - Battle Position (BP) 1

In my latest BETA AAR which was for the impending release of CMSF 2, I made use of a particularly successful Battle Position. This position, which was a minor terrain feature, actually became a massive combat multiplier for me and the death that was dealt from this position was awesome.

NOTE for this section: All quotes in this section using black text are from my AAR, Blue text indicates narrative from my opponent’s AAR.

Basically the forces involved were unique, I was commanding the US and Syrians while my opponent fielded UK and Germans. Both sides were highly capable, well half of mine was anyway... I found the Syrians to be frustrating and severely outclassed. However, only US units fought from BP1 during this fight.

In this battle, my force came on map in waves. We both started with recon forces, followed later by the Advance Guard and finally the Main Body about 10 minutes in. My original intent was to suck my opponent into Engagement Area (EA) 1 and attrit him there before going over onto the attack with my reserves. So throughout the action, the force fighting from BP1 would change as other, more capable units arrived.

Recon Force on BP1


Initially on BP1 I had a couple of USMC LAVs (from my Recon team) which I expected to be more effective than they ended up being.
“As LAV #4 and #1 were moving towards their hulldowns positions they both spotted one of the Marders that came in with Baneman’s advance guard moving laterally just in front of KT-1. LAV #4 and LAV #1 both spotted and opened up on the enemy IFV which suffered several hits in the side and a few penetrations.”

“Later it took several frontal hits and one partial penetration and internal spalling.

Those things are tough, but I expect it took some damage, perhaps to its weapon systems (the ATGM took what looked like several direct hits), optics, or maybe, if I’m extra lucky, to its crew or passengers.

It was reversing when I lost sight of it but not before taking several more hits. It never spotted my firing LAVs.“
“As I've done with all the German infantry, I dismount the Company HQ before their vehicle moves off to its position. It's well that I do, because Bil's keyholed [LAVs] gets a brief spot and fires (rearmost vehicle is firing at my Uncon B bakkies). He gets hits as the Marder crosses some high ground, and again when it crests the next rise. Damage is severe.”
Note my highlight above... the enemy Marder never spotted my two LAVs, though I am certain they were probably spotted by other enemy units. They immediately repositioned next turn.


Though the LAVs on BP1 did shoot up one Scimitar and the Marder as shown above, they were eventually replaced by much more effective units. Eventually I would have one M1A1 on BP1, upon arrival it peeked over the ridge and...


Pulling back and then...
“...M1 #2 got a good firing solution and put a SABOT right into the Challenger’s front turret… double wow… it shrugged off that hit without any noticeable damage. Good news is that this Challenger never spotted mine before the Abrams pulled back into safety.”

Note how at the end of that video the M1A1 reverses off the crest. This would be SOP for this battle:
  • Move forward
  • Engage
  • Withdraw, regardless of the result
I believe this Challenger received gun damage from this hit as it never became a real threat in this action.
“M1 #2 moved into the hollow next to the little hill in BP1 in order to overwatch the Gate to Valhalla with the hopes that the Leopard that was moving in that direction would come under its guns. What it spotted instead was a Marder moving next to the farm ahead of the tank. The Marder spotted the Abrams first and opened fire with its cannon taking out the turret mounted MG, but it was not a fair fight…”

Note in the above video that the Marder does spot my M1, I believe this was because it was moving into position making the spot easier for the German IFV.

After the above action my M1 identifies another German piece of armor:


“I ordered my Abrams to immediately start to reverse while it was reloading. I did not want it to get into a gun duel if it wasn’t ready… when the gunner yelled “SABOT UP!” and while still moving in reverse the tank fired and killed the Leopard... killed him dead and was never spotted in return. I had also ordered one of the LAVs nearby to pop smoke in front of the M1 to cover it… turns out that wasn’t needed.”


So basically that illustrates a successful use of alternate firing positions while on a Battle Position. Later I would get a Javelin on this hill and kill several pieces of enemy armor, withdrawing after each contact in order to reload in safety.

“...the Javelin team that knocked out the Challenger two minutes ago now has spots on both of Baneman’s remaining tanks, the Challenger and the Leopard 2A4. Time ran out before it could launch...”
BOTTOM LINE:
  • The key to using this tactic is to try not to continually pop back up in the same position each time.
  • For the armored vehicles especially I tried to alternate them from peeking over the crest to the key hole position behind the hill.
  • In all cases except one, my units remained unspotted by the enemy vehicles they were targeting.
I hope this was as helpful to you as it was fun for me to fight!  I will be interested to hear how you fair if you try this tactic in one of your battles, or perhaps you have some words of wisdom to share, if so, please add those to the comments..

May 01, 2019

Battle Technique - Using Listening Halts

When moving a squad or a platoon formation and enemy contact is likely, it is good practice to always have at least one team in each squad remain stationary while the other(s) are moving.  This is because, in the game, as in real life, a stationary individual can better listen for enemy sound contact than a moving one.  Combat Mission actually does a very good job of recreating this.  I will pause these teams when working with others from 10-15 seconds (sometimes longer for variation).

Also, an infantry team can identify sound contacts far better than a vehicle can.. so leading your armor with infantry, especially when in close terrain (woods, towns, etc.) is highly recommended.

If you have a lone scout team moving ahead of or to the flank of a larger formation, then that unit needs to stop or pause for a listening halt every turn...  I usually will pause these teams for between 15 and 30 seconds to give them a longer window of opportunity to "listen" for enemy sound contacts.

Following is a composite image from my CMRT BETA AAR illustrating all of the movement orders for an entire platoon that is scouting the woods they are moving through... it shows built in Listening Halts, and how I set movement on short movement legs in order to ensure at least one team from each squad was stationary while the others were moving.

Often one sound contact is enough for a player to get a good feel for an enemy unit's position.. as shown in this image from my CMRT Germans v Russian SMGs in Woods AAR .  In this game, after this contact ran into one of my units, I moved one team back (as illustrated by the blue arrow and created a kill-sack my opponent walked into over the next couple of turns... no sound contacts were visible so I determined I could leave all of my other units in position.

Several sound contacts can tell you a lot about enemy intent and concentrations, as in this image, (from the same AAR), showing (top) beginning of the turn (no contacts), and the end of turn (with several sound contacts).

A lot can be done with this information.

In this following image, again from the same AAR, I have identified, through sound contacts, my opponent's entire deployment.  At this stage of the fight, I don't think he had a good feel for my unit positions at all.

On the left in this image I had two teams using listening halts as they scouted the woods they were in, but after finding none and after identifying the sound contacts as shown, I could safely determine that my opponent had stuffed everything on my right side and could then, with this information advantage, start to plan for my reserves to launch a flanking counter-attack.

June 22, 2018

Combat Mission: Shock Force 2 - BETA AAR


Recently started a BETA After Action report (AAR) for the upcoming Combat Mission : Shock Force 2 game which will bring the original CMx2 title up to the latest Combat Mission engine standards.

My opponent is the SOB who beat me in the Combat Mission : FInal Blitzkrieg BETA AAR, Baneman.  I will attempt to put up a better fight than I did last time.

For this game we wanted to show as much as possible, and yet provide an entertaining and challenging game. We decided that each of us would take two nations, and some UNCONs and Fighters and duke it out man on man, steel against steel (or Chobham as the case may be)... the only constraint was that whoever chose the US would also have to field the Syrians as the US does come with some advantages (Javelins etc.).

This is a Meeting Engagement with the following forces arrayed against each other:

BANEMAN - UK and German - UNCONs including some Technical (gun truck) support)
ME - US and Syrian - UNCONs including some Technical (gun truck) support)


"Wow. An IDF officer I got to know was very insistent on the principle: "Anti-infantry armour and anti-armour infantry." You have provided his school solution here, Bil!"
LongLeft Flank - Battlefront forums
Follow along at the following links.  I will update this post as the game proceeds:

July 04, 2017

Rifle Platoon Leader – PLATOON DEFENSE Part 2 - Fundamentals

Make initial contact with the smallest force possible.
FM 3-90 Tactics
A defensive operation can occur in any battle, whether you are on the offense or not. A local counterattack by a defender when you are advancing could force you to go defensive with at least a part of your force. Or you could be the defender in a scenario, in this case you might have offensive or defensive operations occurring simultaneously.

There are three main types of defensive operations:
  • Hasty Defense 
  • Deliberate Defense 
  • Delay/Withdrawal
Defensive operations may be necessary in order to:
  • Deny the enemy the use of a piece of terrain or an area (i.e. a hilltop, a woodline, or a village) 
  • Buy time to organize for other operations 
  • Hold an area (flank or key terrain) with a small element to allow more important operations to occur in other parts of the battlefield 
  • Force the enemy to concentrate against you, thus weakening him elsewhere 
  • Counter an unexpected move or action from your opponent 
  • Attrit or fix the enemy in preparation for moving to offensive operations 
  • Assemble and prepare to start offensive operations 
  • Regain your breath - especially useful when the battle seems to be getting away from you and you need to buy time to think

Fundamentals of the Defense


As a defender you must perform a thorough METT-T analysis.  Ensure you read my post on that topic fully and understand the basics.  I cannot emphasize enough the importance of knowing the terrain, understanding your force, and having a good idea of the enemy’s capabilities and goals  in being successful in Combat Mission, this is especially true when on the defensive.

Defensive Operations

Hasty Defense - most of the time in Combat Mission we are conducting a hasty defense.  If you have to seize and hold a piece of key terrain, then that is an example of a hasty defense.  Anytime you are dropping a formation into a temporary defensive posture (after a movement, or in reaction to enemy activity) during a battle, you are conducting a hasty defense.  

Deliberate Defense - if you are playing a defense scenario, then you are usually conducting a deliberate defense.  The deliberate defense normally has engineer works (foxholes, bunkers, mines, etc.) and mutually supporting positions.  Personally I find this type of action to be very limiting and it is the easiest to be successful against for an attacker as he can identify strong points and take them down one at a time.  For this type of defense to work the commander MUST maintain a mobile reserve to enable him to surprise the attacker with local counter-attacks or maybe even a spoiling attack.

Delay - The delay usually is made up of subsequent hasty or deliberate defensive positions and is used to slow or attrit an enemy to the point where he cannot continue offensive operations.  This is actually my preferred method of defending, and it can be devastating to an attacker, but it must be well thought out with pre-identified fall back positions, and subsequent lines of defense pre-positioned along the withdrawal routes.

Depth on the Defense - NEVER put the majority of your combat power in the forward positions or on the first line of defense.  

Plan a defense with successive defensive lines that you can fall back to and provide each line of defense with enough combat power to make it viable.

Example showing successive lines of defense

Intelligence - Whether on the offense or the defense it is paramount that you identify the enemy units, formations, and axes of movement. This information will be a combat multiplier that you can use to good effect as you plan on how best to meet your opponent with fire and maneuver.

Mobility - At times it will be necessary to stand at all costs in a position, but an efficient, effective defense is identified by mobility, both laterally and in depth to move forces as the situation dictates.

Flexibility
- In my opinion the single most important tenant when on the defense is flexibility, As the defender you will have no idea (in most cases) where the attacker will be coming from, as such you need to identify his avenues of approach (AAs) and his force composition as quickly as possible. Once you have a good idea as to where and in what strength he is attacking, you can shift forces accordingly.

Offensive Action - Even on the defense you should be looking for times to counter-attack or conduct a spoiling attack. This can be a tricky affair, and you have to weigh your available combat power against the enemy strength, ensuring you do not end up biting off more than you can chew.

Mutual Support
- Best case is to position your units so they can provide overlapping areas of fire and quick support for each other. In close terrain (like hedgerow country) this will be near impossible to achieve, yet this should be something you always try to achieve.

Mobile/Active Defensive Operations

I highly recommend a mobile/active or maneuver based defense, however:

DO NOT:
    • Get so excited that you go over to the offensive before you are really ready
    • Waste your main combat power in counter-attacks in areas where little information has been received
    • Overextend your forces and risk getting portions cut off from any help 
DO:
    • Use fast moving scouts to gather information on the enemy’s dispositions and movements
    • Use your main counter-attack force to break up over-extended enemy formations or to eliminate smaller enemy units or formations that cannot be quickly reinforced by your opponent
    • Conduct spoiling attacks if possible
    • Withdraw through the next line of defense if the pressure gets too great

March 19, 2016

TANK TACTICS: Panzer Vorwärts! Aber mit Verstand! - ANNOTATED

Armor Forward! But with Intelligence!


This training circular that was issued by the German Panzer force in WW2 was intended to give panzer commanders and crews a basic set of building blocks for tactics, techniques, and procedures that could be used to better apply armored units in combat.  These were compiled from the German Army's combat experiences and are invaluable advice everybody who plays the Combat Mission games should follow.

What I intend to do with this post is to quote from this pamphlet and try to give a little insight into how each pointer applies to using armor forces in Combat Mission.  My comments will be in black text.

Though the lessons are mainly targeted at actions against the Russian Army, they apply to any combat force regardless of the opponent.

I searched the internet for a copy of the full document but alas was unsuccessful in my search.  What is freely available online is an English translation (by Fionn Kelly) of the 30 Points for Success on the Battlefield.  If anybody has a scanned copy of the original document that you can share, please contact me.

Introduction:

"The Panzer Regiment is, by reason of its firepower, protection and mobility the main fighting power of the Division. It’s strength lies in unexpected, concentrated and determined attack; aggressive leadership and daring operations."
The intent of any branch, but especially the armored force should be to apply superior combat power at key points at key times during an action.  Armor in particular is ideal in this role due to its:
  • Maneuverability
  • Inherent combat power
  • Survivability 
This paragraph which emphasizes "unexpected, concentrated and determined attack" implies:
  • Apply your combat power where your opponent least expects it.
  • Concentrate your fire, if not your actual units on one key point.
  • If you attack, attack with enough combat power to overwhelm the enemy held position.
In addition the paragraph mentions "aggressive leadership and daring operations" which in the CM world translates to:
  • Be bold in your maneuver, but not foolhardy or careless.
  • Take advantage of the situations presented to you and dare to take chances and seize opportunities or throw your combat power at weak points before your opponent can reinforce or support them.
"Combat in Russia has shown that victory is not necessarily determined by vehicle type or quantity, but the spirit and skill of the tank soldiers operating them. This is the critical factor.

This exemplary combat spirit can, however, count for little if the panzer truppe is not led by competent officers. Superior tactical leadership in battle is a prerequisite when one desires few, or better still, no casualties.

The purpose of this volume is to pass on the collective experience of veteran front line combat leaders in a simple and understandable format."
Whether playing CMRT against a Russian player, or any of the other WW2 Combat Mission games, it is a well known fact that troop quality and the skill of the player commanding them can redress many of the disadvantages inferior equipment has.  
When combating superior armor (say Sherman versus Panther or Tiger) then you have to use extra care in your maneuver and application of combat power.  This is "tactical leadership in battle".
A commander who does not use his head when using his armor, or who throws his combat power at an enemy without having some knowledge of what he is up against, can lose a battle regardless of the training level of his force, or how superior his tanks are compared to his enemy's. 
30 Points for Success on the Battlefield:

"1. Before any attack acquaint yourself with the ground. Use the information provided by other units or by the map. Share this information with your subordinate commanders. Exact information and correct estimation of the terrain will be the decisive difference between victory and defeat."
I cannot emphasize how important a good map analysis is prior to any battle.  At least during setup, examine the map from your point of view and from your opponents and attempt to identify key terrain, potential friendly and enemy avenues of advance, danger areas, etc.   
See my METT-T analysis post for more detailed information.  Also see any of my Combat Mission AARs for examples of terrain analysis in actual games.
"2. No armored attack is so urgent, even under the most pressing situation, that you do not have time to inform subordinate leaders of the tactical situation, mission objectives, and technical and logistical factors of the impending action. Impetuous action on your part can result in unnecessary loss of men and materials and place the success of the mission in jeopardy.
Take your time, study the scenario requirements and conduct a through reconnaissance.  In other words, do not be cavalier with your force.  Use your combat power only after you can make a studied appreciation of your opponent's combat power, where it is concentrated, where it is weak, etc.
"3. Only careful combat reconnaissance can protect you from surprise. Protect to your flanks as well as the front. Observation to all sides is the duty of every commander. ALWAYS KEEP YOUR EYE OUT FOR THE ENEMY!" 
One of the main themes of my Blog is reconnaissance.  If you take nothing else from what I have posted, I hope you can take away how important I believe combat reconnaissance is to success in the Combat Mission games.   
Even though this post is primarily tank focused, most Combat Mission actions feature mixed forces of armor, infantry, and support assets.  Use them as a team and use each component in the role that best suits them i.e. infantry makes the best scouts, armor make the best quick attack force, artillery is best used to interdict or soften up an enemy position, etc.
See my post on ReconnaissanceLTC Scott Coulson's article The Patience to See, and my Platoon Scouts post for more information and guidance.  
"4. In the combat environment you must always be conducting an appreciation of the situation.  So at the decisive moment you can make the correct decision and issue short, clear orders without delay. This is the kind of leadership for which you are responsible."
This works hand in hand with your reconnaissance plan.  Always try to be in the process of assessing, or reassessing the enemy force, defenses, and intent.  It is a process that should only end when the scenario is concluded.  
When a "decisive moment" appears, unless you have been working this recon-assess loop then it might not be obvious to you.  It still might not, however you have a much better chance of recognizing these opportunities if you have a good assessment of the enemy force and a good educated guess as to the opposing player's intent.
See my Decision Process post and my Estimate the Situation post for more detailed information.
"5. Iron radio discipline is a prerequisite of good leadership, particularly when your only method of command is radio. In the point company, for instance, the trail platoons should not use the radio, except in emergency, leaving the net clear for the point platoon leader."
Not really relevant to the Combat Mission games until they more realistically model combat communications.  I have designed a set of  rules for the WW2 Combat Mission games that attempt to apply some modeling for the communications layer that is currently only abstractly modeled in the game. 
 "6. You must lead with strength. At least two tanks must be forward, and the trail platoons must be held far enough forward to support the lead platoon. The more guns that fire in the first minute, the quicker the enemy will be defeated and the fewer losses you will suffer."
A few important concepts in this point:
  • Do not operate tanks independently, at least use them in teams of two tanks.  
  • Concentrate your fire, if not your units.
  •  Overwatch any armor movement with as many tanks as is possible.
"7. When breaking cover, do it quickly and together. The more targets the enemy is shown simultaneously, the harder his fire control and distribution will be, and the more guns you will have in effect on the enemy."
In short, attempt to overwhelm the enemy, give him more targets than he can deal with while you attempt to have more guns on the enemy than he can handle.  be warned though, coming into view all at once without having an idea on where the enemy is can lead to major losses to your force.  In my CMFB BETA AAR I came over a ridgeline with two M18 TDs thinking I knew where all of the enemy armor was only to be ripped apart by an unseen and unexpected Panther tank.  
"8. In the attack drive as fast as you can. At slow speed you can see and shoot only a little better than at high, and are much more likely to be hit. For a tank there should be only two speeds: the halt (for firing!) and all out forward. This is the basic principle of tank combat!"
In the Combat Mission games it is not wise to take this point too literally.  When crossing open spaces, and while being overwatched by other tanks it is wise to travel as fast as possible to keep your exposure time to a minimum.. most times the speed of your tanks will be dictated by the terrain and the situation.  
The second point in this paragraph about using "the halt (for firing!)" is of course very wise especially when your target is an enemy vehicle or point target like a house, or trenchline where accuracy is important.  However a strong case can be made for firing on the move when the target is soft (infantry or guns)  and it is area fire.  Use this technique when your main goal is to keep the enemy's heads down as you advance your armor, but do not expect to cause very many casualties as the fire can be wildly erratic.
 "9. When antitank weapons are encountered at long or medium ranges, you must first return fire and then maneuver against them. First, issue a firing at the halt order to bring effective fire to bear then commit the bulk of the company to maneuver on the enemy with one platoon providing fire support at the halt.
This point is describing the Fire and Movement technique.  Though my post on this subject is infantry based, any of the tactics I describe can be used with armor units as well.
Also see my Squad Attack Drill post and the Tank Section Attack scenario.
 "10. When antitank weapons are encountered at close range, stopping is suicide. Only immediate attack at the highest speed with every weapon firing will have success and reduce losses."
Another point that is highly situation dependent.  Most times if you are maneuvering your tanks and come under anti-tank gun fire you might not even know where the fire is coming from.  In these cases I would suggest you pop smoke (if available) and withdraw.  Then scout the area where you suspect the fire came from in order to identify where it originated.  Once you have that information you can area fire to suppress the gun and then attack it.
If the anti tank gun's location is known then by all means area fire around the gun and assault it using the Fire and Movement technique. 
 "11. In combat against the antitank guns you may never even under the protection of strong fire support allow a single platoon to attack alone. Antitank weapons are not employed singly. Remember lone tanks in Russia are lost!'
Basically what this point is emphasizing is to not piece-meal your tanks.  If you have more than one tank in a scenario use them as teams of at least two tanks, but never alone.  Exceptions to this might be when in support of infantry and the tank is kept to the rear only coming out to fire when the area has been cleared by the infantry.  The tank is still part of a team in this case though, and is not alone.  
 "12. You must continually keep a broad interval (100m) between vehicles. This splits the enemy's defensive fire and complicates their fire control. Narrow intervals must be avoided at all cost."
The distance between your tanks is not as important as the guidance to never clump your tanks in close proximity to each other.  I always stress to concentrate your fire, not your armor, this translates to keep a good distance between your tanks (so an enemy anti tank gun or tank can't easily fire on more than one tank at a time) but ensure they can target the same enemy vehicles or enemy held position.  
Clumping your armor into the same piece of ground will only simplify the enemy's targeting.
"13. When an impassable obstacle, i.e., a minefield or antitank ditch, is encountered you must immediately and without hesitation give the order to withdraw into the nearest cover. Standing still, in open sight, trying to carry on the attack, is a poor tactical position to adopt and the risk of loss is high. Better to withdraw into cover and conduct an appreciation of the situation."
Similar to my advice in point 10 above, when any obstacle appears that will block your movement, whether it be a road block, minefield, or enemy gun or tank, you should back up assess the problem and only when you have an appreciation of the situation make your decision on how to tackle it.
"14. When your advance must pass potential enemy antitank positions, for instance a woodline, you should either pass by them so closely that you are inside their minimum range, or remain so far away that you are outside their maximum effective range."
 Common sense advise, and I would add to it by advising you to use Masked Movement whenever possible to keep your high value assets out of the line of fire of any anti tank weapons.
 "15. Enemy tanks should not be attacked directly. It is preferable to avoid them until you can move into favorable firing position, and surprise them from the flank or rear. Repelled enemy tank assaults must be aggressively pursued."
 Attacking an enemy unit, but especially anti tank guns and tanks, from the flank or rear is always preferred.  This can take some time to arrange, and you have to be constantly on the lookout for unspotted or unexpected enemy units that could be lying in wait for just such a move.
"16. A strongpoint, i.e., a small village or artillery battery position, whenever possible should be attacked from different directions simultaneously in order to split enemy defensive fire and deceive him about the true location and direction of the attack. In this manner your breakthrough will be easier and your losses fewer."
 Whenever attacking an enemy position coming from multiple directions is highly advisable as it thins the enemy defenses and forces him to guess where your main thrust is going to land.  
When attacking a position, I often don't know myself from which direction my main attack will come, that decision many times will come after I have contact with the enemy defenses and have a better picture of them.
"17. Always prepare dug in positions and camouflage against the possibility of air or artillery attack. Being sorry afterwards is no excuse for losses taken by these causes."
Of course the Combat Mission games do not take into account camouflage and you can not dig in during a scenario.  however you can be smart about unit placement, using treelines and woods to shelter your high value armor.  These will provide some concealment from roving enemy aircraft.
"18. Ammunition should not always be conserved; in the decisive moment, if you want to save casualties, you may expend ammunition at exceptionally high rates (for instance, an emergency attack)."
Ammunition consumption can only be controlled in the game by the use of restricted covered arcs and keeping your units out of contact.  Maintain fire discipline as much as possible until you come into contact with enemy high value targets, then let your tanks fire free until that asset is destroyed, damaged, or pulls out of your line of fire,
"19. Never split your combat power; that is to say, always employ the company so it can provide mutual support. When your mission has two objectives attack one and then the other with all force at your command. In this way your probability of a successful outcome is higher with fewer casualties."
The old military axiom to never split your force should indeed, whenever possible, be applied to the Combat Mission games.  Your platoons should at least be mutually supporting and your entire force should operate as a team to accomplish the task at hand.
The goal is to mass against one enemy position at a time and eliminate each prior to moving on to the next. 
"20. The benefit of support from artillery or aircraft must be taken advantage of immediately.  As soon as this support has ceased you must be on the objective engaging the enemy. Do not give the enemy time to recover. These fires generally only produce a suppressing effect, not a destroying one. It is better to risk a friendly shell or bomb than to charge into an active antitank defense."
Whether the support fire is indirect, direct, or tactical air, the goal is to keep the enemy's heads down and keep them from returning fire as your attacking force closes on the position.
"21. Other weapons and arms, attached to you, should not be misemployed.  Do not use them for purposes for which they were not intended, for example, do not use tank destroyers as assault guns, or armored infantry as tanks, or recon as engineer troops or infantry.
 Each asset has a purpose and a strength and using them in a fashion that does not play to that strength is asking for disaster.  Plan your battles wisely in order to utilize your force as a team each component of which has a role.  A force used in this fashion will be stronger and harder to defeat.  Look for opportunities presented by your opponent where he is not following this rule, and punish him.
"22. Unarmoured or lightly armored units attached to you must be protected from loss until they are needed for their own operational tasks." 
Protect the vulnerable.  If enemy tanks or anti tank guns are present on the field do not move your halftracks and truck borne infantry until those enemy assets have been neutralized, damaged, or forced to withdraw.  Protect the movement of these units by overwatching them with your tanks.
"23. Attached units placed under your command are not your servants, but your guests. You are answerable to supply them and share everything they need. Don't just use them on guard duty! In this way they will work better and more loyally for you when you need them. And that will be often!"
Of course in the Combat Mission games any support units will appear as a part of your force and will rarely be identified separately.  There is nothing to stop you from using them in any way you wish (as long as you follow point 21).
"24. In combined operations with infantry or armored infantry, ensure the various teams can provide mutual support. Which of the two is leading is a secondary matter; the intention of the enemy is to separate your combined forces. Your battle-cry must be "Protect the Infantry!" and the infantry's battle-cry is "Protect the Tanks!"
One hand washes the other, tanks without infantry is a weaker force than a tank unit supported by infantry.  See my CMFB BETA AAR and my CMBN Marketgarden BETA AAR for examples of all or heavy tank forces that ended up far weaker than they initially appeared.  I lost both of those games mainly because I did not purchase a balanced force (plus some sketchy game play on my part).
In action, if you can separate the enemy tanks from his infantry then the enemy infantry will be far easier to deal with, as so will the now unsupported enemy tank unit.
"25. You and your soldiers must always concentrate on your assigned mission. Do not vary from the task unless the enemy is a threat to the accomplishment of your mission. Then you must attack and destroy him."
In the Combat mission games I tend to concentrate on destroying the enemy force first, accomplishing the mission second.  Especially when on the attack.  When defending your task is the mission, and delaying the enemy is more important in many cases than destroying him.
"26. After a victorious battle keep alert and prepare for a counterattack, which will certainly come and probably from a different direction than you expect. Later you can collect the spoils of victory."
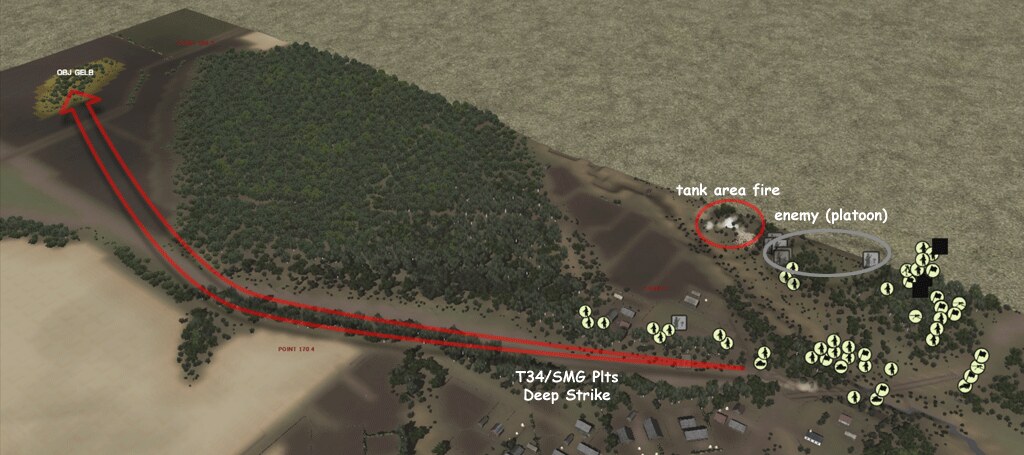
When an opponent does counter-attack, like in my CMRT BETA AAR where my opponent attacked my Deep Strike force with his armor.. unfortunately in this case I was ready for him and had time to react when I saw him coming.
"27. In a defense or security mission, position your tanks so that not only their firepower, but also their shock value can be brought into play. Only leave a few tanks in stationary firing positions. Keep most as mobile reserves under cover. Tanks defend aggressively!"
This is great advice when using tanks on the defense.  Do not show your hand too early and allow your opponent time to react and plan, rather let him advance then cause as much damage as possible with your previously hidden armor.
"28. Against strong enemy resistance, there is no point in continuing to attack. Every failed attack only costs more casualties. Your effort must always be to hold the enemy with only weak forces, in order to use mass of your strength at another, weaker place, breakthrough, and destroy the enemy by surprise attack in the rear or flank."
Never push an attack beyond the reasonable.  If it looks like the task is becoming impossible or will cause you more casualties than is comfortable then withdraw, reassess, and try something else.  If the entire battle has reached a point where it is looking hopeless to you, then there is no shame in asking for a cease fire.
The main item in this point that I want to call out is the third sentence.  When defending, use as few units as possible and husband your main strength for where the enemy's main attack appears to be going, or for where he is showing an opening for a counter-attack or a spoiling attack,  
"29. Never forget that your soldiers do not belong to you, but to Germany. Personal glory hunting and senseless daredevilry lead to success rarely, but always cost blood. In battle against the Bolsheviks you must temper your courage with your judgement, your cunning, your instincts and your tactical ability. Only then will you have the prerequisites to be victorious in battle and only then will your soldiers look on you with loyalty and respect and always stand by you in untiring combat readiness."
 Throwing units into senseless situations will rarely help your cause and could instead cost you the battle.  When you do commit your tanks and your main combat power do it with whatever knowledge you have gained through the Decision Process.
"30. The panzer division in modern warfare is the decisive arm of combat, much like cavalry was in former times. Tank officers must carry on in the tradition of the cavalry, take up its aggressive spirit on behalf of the Panzer arm. Therefore take note, as a basic combat principle, of Marshall Blucher's motto, "FORWARD AND THROUGH!" (but with intelligence)."
I want to emphasize the "but with intelligence" phrase.  After reading this and my comments I hope the one thing that you come away with is to think before acting, scout the enemy before planning, and to continually update your threat assessment as the battle unfolds, and only then make the decisions of how best to use your armor, infantry, and support assets.
I hope this post is helpful.