

PART I - APPROACH MARCH

Approach March: Advance of a combat unit when
direct contact with the enemy is imminent. Troops are fully or partially
deployed. The approach march ends when ground contact with the enemy is made or
when the attack position is occupied.
When organizing your platoon when on the approach march
(movement to contact) you should use one of the following platoon
formations. Which to use depends on the
terrain you are moving through, your mission, how safe you feel, etc.
These can be as loose as you wish so use this as a template for
proper movement formations, you do not need to rigidly adhere to these
formations and the actual use will be highly situationally dependent.
In the game I tend to instinctively use whatever formation I
think is best, though often no formal formation is adhered to at all and the
movement is more fluid and takes the shape allowed by the underlying terrain,
however the underlying formation adopted will be a derivative of one of the
following.
Learn the basics, experiment with them, and you might see
that this knowledge leads you to subconsciously apply them or variations of
them without thinking. Or, you might see
that what you are already doing is represented here and this will perhaps provide
structure and explanation to your in game handling of your platoons.
Without
knowledge action is useless and knowledge without action is futile.
Abu Bakr
PLATOON FORMATIONS:
NOTE 1: Ensure you continue to use the proper squad movement techniques as the situation
demands. Regardless of how your higher
formations are organized for movement, your lower echelon units (in this case
your squads) should still maintain their movement discipline.
NOTE 2: Ensure you
maintain good scouting procedures and send a scout team ahead of the formation
and perhaps another scout team to one or both flanks if you think the situation
warrants.
Platoon Column
"Platoon
column" is vulnerable to fire from the front, and requires a change in
disposition to employ the weapons toward the front; however, it is easily
controlled and maneuvered. It is especially suitable for narrow, covered routes
of advance, for maneuvering through gaps between areas receiving hostile artillery
fire, and for moving through woods, and in fog, smoke, or darkness. The depth
of a platoon column averages 150 to 200 yards.
FM 7-10 – 18 March 1944
 |
| Platoon Column Formation |
When using this formation, place
your squads one behind the other. I usually
place my Platoon Leader somewhere towards the center of this formation to
enable it to keep both the front and rear squads in command. When moving fast or through tight terrain
this is a good formation to adopt.
Line of Squads
"Line
of squads" enables the platoon leader to develop the maximum fire power to
the front in the shortest time. It is more difficult to control, and lacks
maneuverability; but it is less vulnerable to fire from the front. It is
suitable for rapidly crossing an area exposed to hostile long-range machine-gun
or artillery fire which cannot be avoided.
FM 7-10 – 18 March 1944
 |
| Line of Squads Formation - showing two scout teams |
As the quote from FM 7-10 states,
use this formation when moving across open terrain especially when enemy contact
is probable. I usually place my platoon
leader behind the formation and try to ensure all squads are within command
range.
Two Squads Forward, One Squad Back
One Squad Forward, Two Squads Back
"Two
squads forward, one squad back" and "one squad forward, two squads
back" are formations which provide security to both front and flanks,
favor maneuver and control, and also provide flexibility in meeting new
tactical situations. The factors usually determining which of these formations
is to be employed are the terrain, the frontage which the platoon must cover,
and the proximity and actions of the enemy.
FM 7-10 – 18 March 1944
 |
| Two Squads Forward, One Squad Back - showing two forward scout teams and one flank scout team |
I refer to these as the Platoon Wedge (one squad forward, two squads back) and the Platoon Vee (two squads
forward, one squad back).
 |
| One Squad Forward, Two Squads Back - showing two forward scout teams and one flank scout team |
In both of these formations I
will place the platoon leader toward the center of the formation either between
the trail squads (wedge) or in front of the trail squad (Vee). These are my preferred platoon formations for
most terrain, especially when moving through woods or other close terrain. These formations ensure that you have a reserve
that you can use as a maneuver element in a platoon attack drill.
Squads Echelon Right or Left
A
formation with squads echeloned to the right or left rear may be used to
protect an exposed flank and permits maximum fire to be delivered promptly
toward that flank.
FM 7-10 – 18 March 1944
 |
| Squad Echelon Right |
I will use this formation for a
flank platoon if its flank cannot be secured by another formation or masked by
a terrain element. It ensures that the
platoon can quickly return fire to the defended flank if necessary.
DIRECTION AND RATE OF
ADVANCE
Maintain a steady pace as you
advance. Your speed will of course be
dependent on the movement technique(s)
your squads are using. Make sure you are
using the correct squad movement technique for the situation.
I often will vary the pace of the
individual components of the formation so I can better spot for enemy
activity. You can use entire squads for
overwatch if you like so your moving squads have some sort of security and your
platoon will move faster than if using overwatch within each squad (which will
be more necessary once enemy contact is attained).

Regardless of the formation you
should always maneuver your force using the terrain to help mask your force
from enemy observation. It is more
important to mask your movement, thus taking a longer more circuitous route
than to rush your movement over open ground.
Take extreme care when ordering your movement at all times. Your opponent will be frustrated as if done
correctly he will get some scattered UI contacts but rarely anything firm, and
often will never see your movement at all until it’s too late.
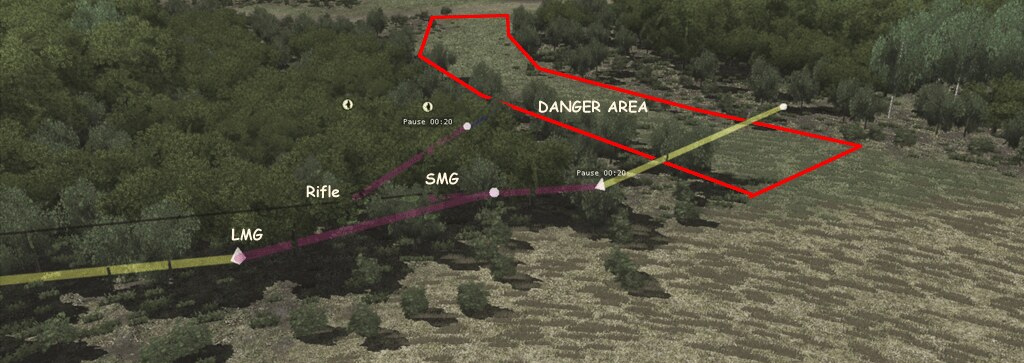
Open areas, such as roads,
clearings in the middle of woods, etc. should be crossed as quickly as possible
or better, bypassed if possible. Ensure
you have units providing overwatch as each unit crosses the potential danger
area. Alternately you can move the
entire platoon up on line and cross them all in a rush as one complete
formation to keep the time spent in danger to a minimum.
CONTACT
Best practice is to maintain
visual contact between your squads and your platoon leader at all times
ensuring the entire platoon is within command range.
 |
| Top image shows actual positions, the bottom (with the PL selected) shows that most of the platoon is out of command and the PL can no longer see any of his subordinates except the 2nd Squad |
Your scout team(s) should be well
in front of your forward squad(s), but within visual range. If you play Iron mode then it is easy to
ensure your formation stays within visual distance of your scouts. You want your platoon to be able to quickly
maneuver on any enemy unit(s) your scout team identifies and this can be difficult
if there is too much distance between them.
SUCCESSIVE OBJECTIVES
Often the distance to be traveled
can be quite long. In these
circumstances make your movement in a series of bounds to your ultimate
destination. Keep moving through each
objective as you reach them, only use them as a means to orient and control
your movement.
Keep analyzing the situation
throughout your move and determine if and when you might need to slow your
pace, change your Approach March formation, or end the approach march.
ACTION ON ENEMY
CONTACT
When an enemy unit fires on an
element in the platoon or an enemy contact is identified, I normally stop
everything and quickly analyze the situation.
If the element being fired on can eliminate the threat then the rest of
the platoon continues its movement while the element in contact deals with the
threat. If the unit in contact cannot
deal with the threat on its own then those elements necessary from the platoon
will assist by providing fire or maneuver support as required.

I will deal with every enemy
contact as they arise and make a decision to either bypass the enemy unit, eliminate
it, force it to withdraw, or call up additional firepower if I determine that it
needs to be removed from my path and it is too much for my platoon to handle on
its own.
If the enemy unit requires a full
platoon attack, then this will end the Approach March and begin the Platoon
Attack.
TERMINATION
The Approach March for the rifle
platoon ends when combat begins.

Great!
ReplyDelete